Guarantee your clients receive an on-brand, engaging call experience even while you're away! There are three things net2phone Canada suggests you implement before the much anticipated time off:
- change your out-of-office answering rules,
- update your voicemail greeting, and,
- if your organization has a holiday auto attendant, add a company-wide holiday greeting!
Office managers and call center supervisors must be in "My Account" view to access their Time Frames, Answering Rules, and Messages tabs.
CREATE A HOLIDAY TIME FRAME
Before you can jump into your answering rules and auto attendants, you need to create a Holiday Time Frame for the days you will be away, or the days you want your Holiday Auto Attendant to play.
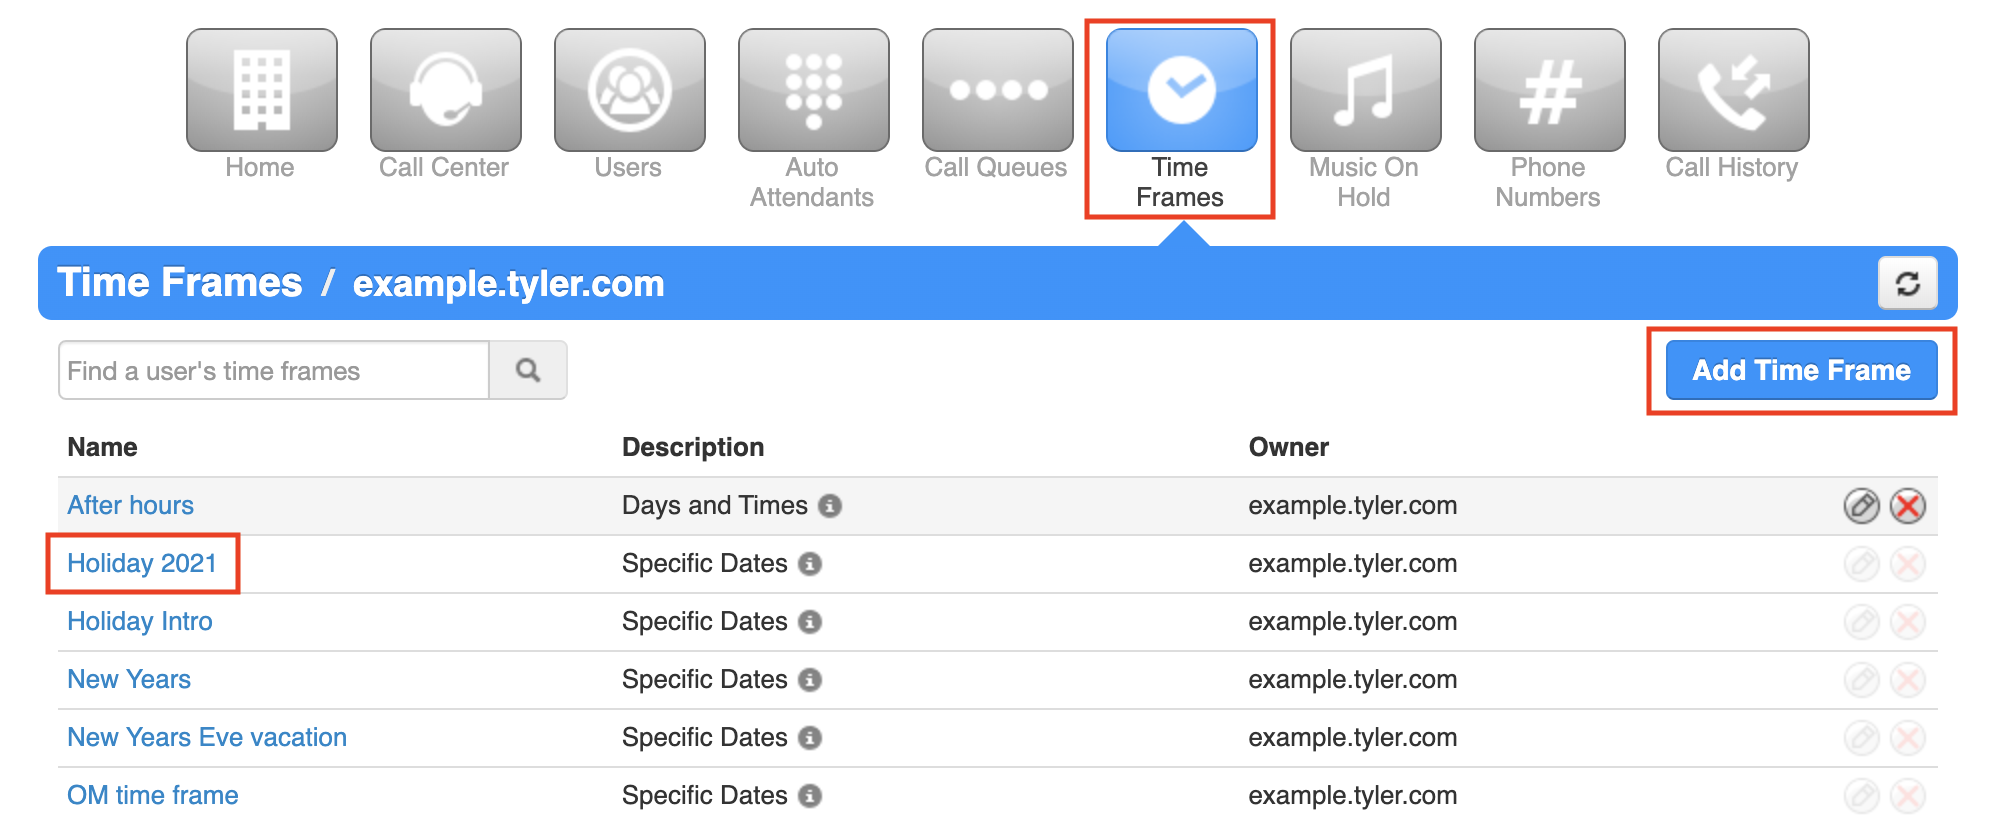
Specific Dates or Ranges Walkthrough
- Navigate to the Time Frame tab of your Sonar portal.
- Click the name of the time frame you want to edit or click Add Time Frame on the right side.
3. Select one of the three types of time frames:
- Always
- Days of the week and Times
- Specific dates or ranges
We recommend using specific dates and ranges for a holiday time frame, that way you only have to set it once and it will automatically time out, whereas always and days of the week and times must be changed manually.
CREATE A HOLIDAY ANSWERING RULE
Once your time frame is ready to go you're ready to set your answering rule.
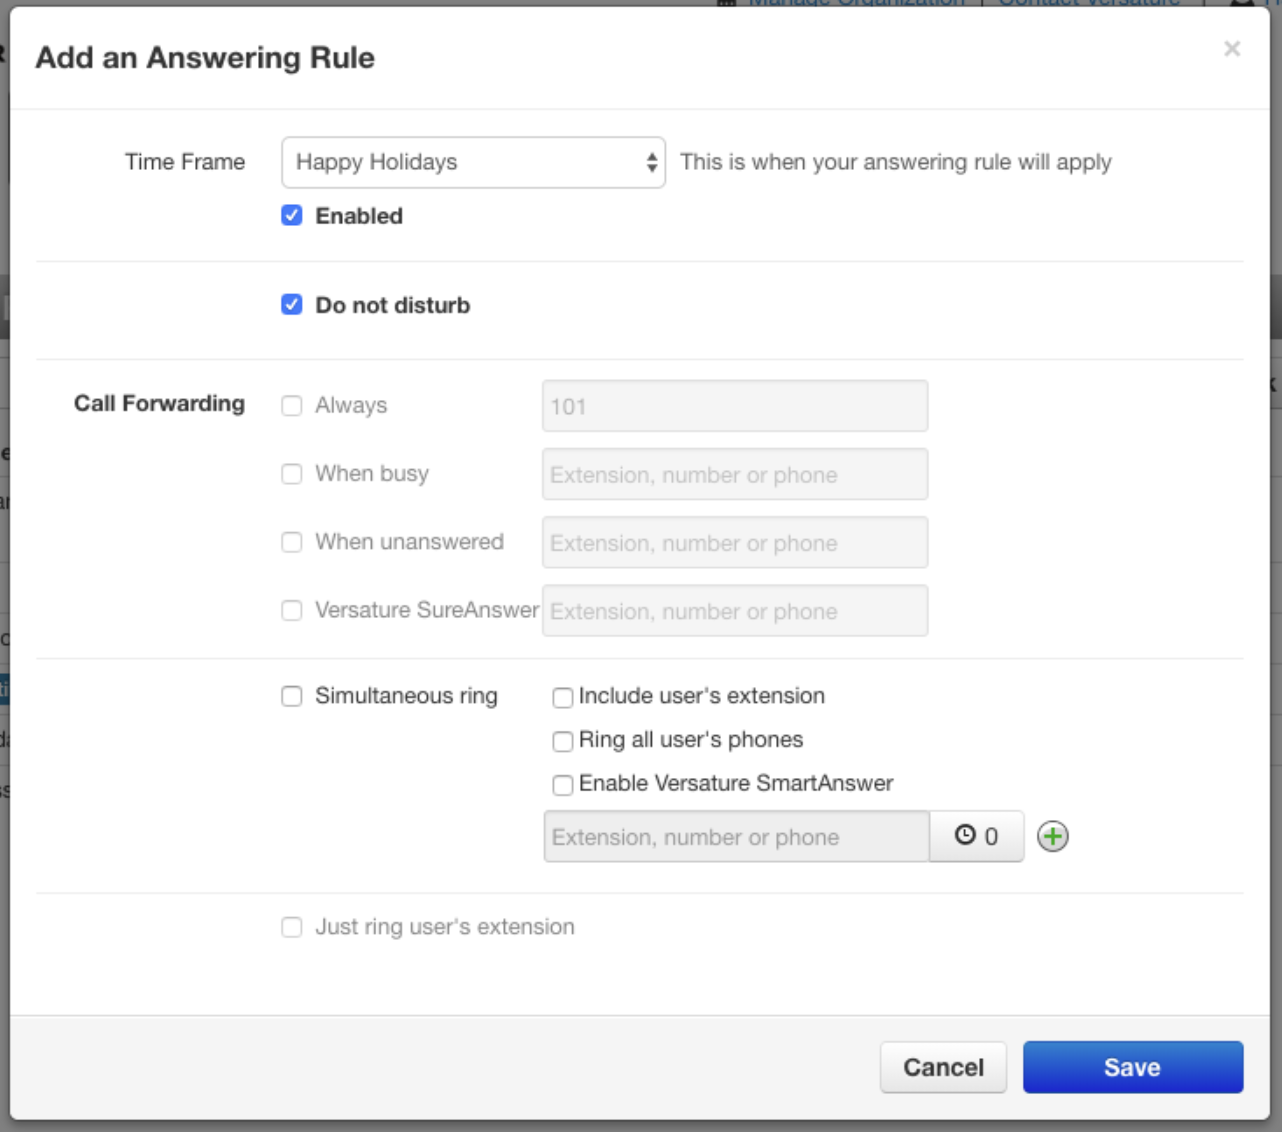
Set your Answering Rule to DND Walkthrough
- Navigate to the Answering Rules tab of your Sonar portal.
- Click the name of the answering rule you want to edit or click Add Rule on the right side.
- Choose the answering rules you want for your time away. We recommend Do not disturb, so your calls are sent straight to voicemail.
If you want to learn more about how Answering Rules work, check out the Answering Rules Overview.
CREATE A HOLIDAY VOICEMAIL
It's good practice to set up an out-of-office voicemail informing clients that you'll be away and when you plan to return their message. If you're in the festive spirit and think your clientele would appreciate some holiday cheer, you can include some warm wishes in your voicemail! Check out the net2phone Canada blog for tips on your Holiday Greetings!
Voicemail Greeting Walkthrough
VOICEMAIL TIP!If you're someone who likes to keep up with work while you're away, we recommend enabling Unified Messaging. Unified Messaging sends voicemails to your email, including a written transcription and a .wav file if you want to listen through your email. |
- Navigate to the Messages tab of your Sonar portal.
- Click the Settings sub-tab.
- Under "Greetings," click the speaker icon to "Manage" your greetings.
- In the pop-up window that appears, click Add Greeting at the bottom.
- Choose either upload, record or text-to-speech and fill out the required fields.
- Click Done to save.
- To change your current voicemail greeting, use the drop-down menu next to "Voicemail Greeting."
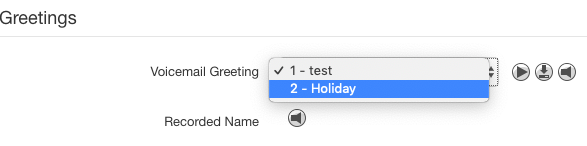
Always remember to save at the bottom of the Messages tab before leaving.
HOLIDAY AUTO ATTENDANT
Add Auto Attendant and Intro Greeting Video Walkthrough
STEP ONE: LOCATE YOUR HOLIDAY AUTO ATTENDANT
With a holiday greeting, your auto attendant could start with "Happy holidays from everyone here to you!" and then your regular auto attendant would immediately play as it usually would. The first step is to ensure you have a holiday version of your Auto Attendant in Sonar.
-
In the Office Manager view, go to the Auto Attendant tab in Sonar.
If your holiday configuration is ready, you should see one called "Holiday Auto Attendant" along with your regular Auto Attendant. -
If you do not have one created, click the Add Attendant button and enter:
- the name,
- the same extension number as your default auto attendant, and,
- the time frame.
STEP TWO: ADD AN AUTO ATTENDANT GREETING
You may need to create a separate time frame for your auto attendant, depending on your organization's time off schedules.
NOTES
- You must already have a time frame in place to use for your new auto attendant greeting.
- If you do not create a time frame, the auto attendant will be set to default, which is all the time, every day of the week.
1. In the Auto Attendants tab, click your holiday auto attendant.
2. Click the speaker icon to manage your greeting.
3. Enter a recognizable description of the greeting.
4. Choose either upload, record or text-to-speech and fill out the required fields.
5. Click Save before leaving this page.
