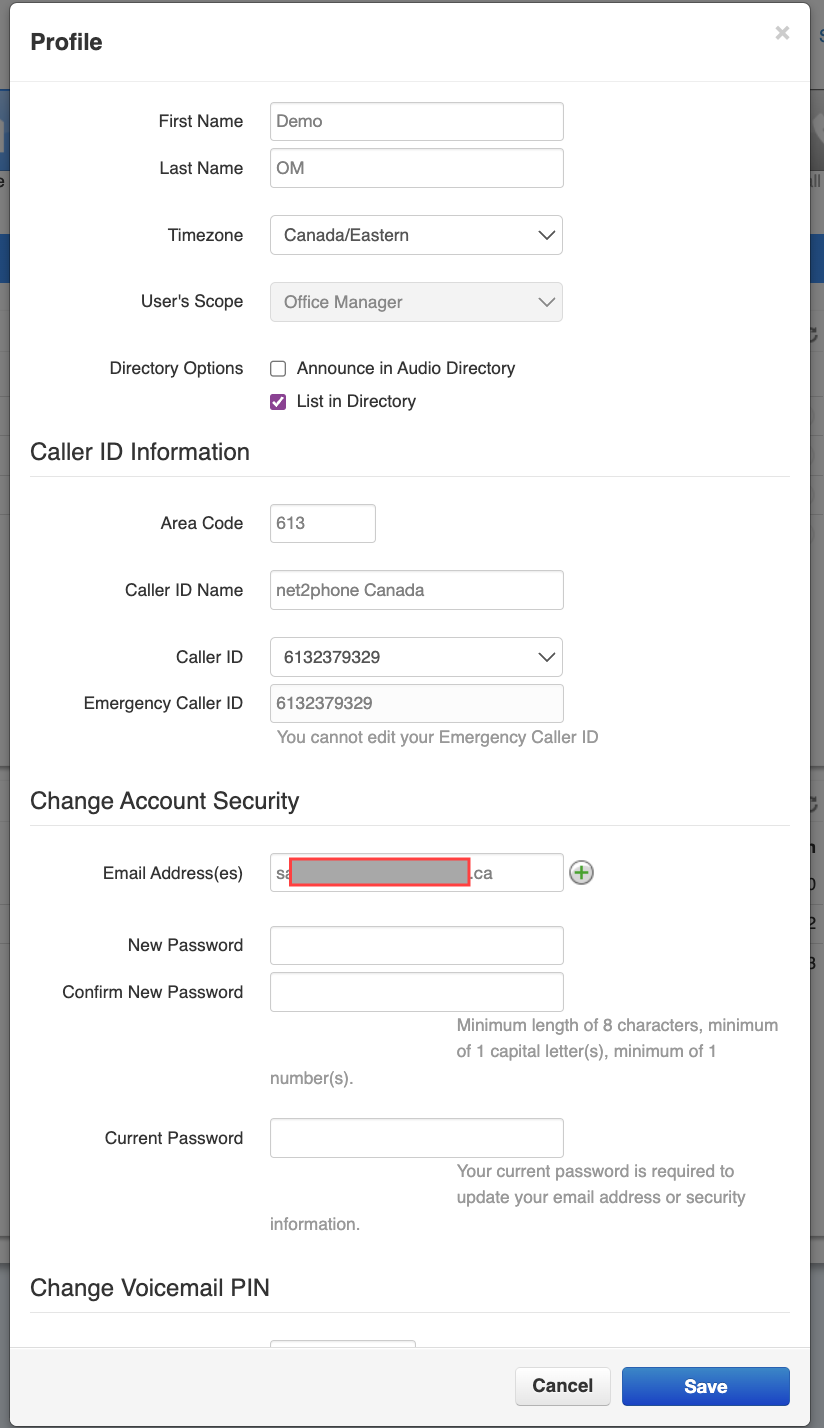
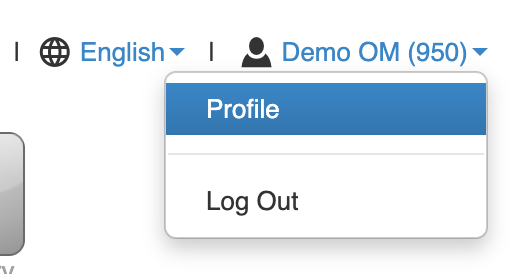
You can locate your profile by clicking the drop-down menu at the top right corner. Once in your profile settings, you can change your name, department, timezone, email address(es), and dial-by-name directory options directly. Office managers and call center supervisors need to be in My Account to access their profile settings.
Caller ID Information
The first section is Caller ID Information. You have the option to change:
- your area code, and,
- caller ID (outbound calling number).
Only Office Managers can change 911 Caller ID information or your ID name.
Account Security
You can change your password. Your password must:
- be a minimum of 8 characters,
- be comprised of at least 1 number, and
- be comprised of at least 1 capital letter.
Change Voicemail PIN
At the bottom of the profile menu, you can change your PIN. Your PIN must:
- be only numbers,
- be non-sequential numbers,
- be non-repetitious numbers, and
- be 6 digits in length.
Always remember to Save your changes in your profile settings before leaving the window.

Update your Sonar Email Address
Your designated email address is utilized for multiple functions within the net2phone Canada Sonar system. Use this article as a guide to help you update your email address or add a secondary email to your Sonar account.
Email Functions in Sonar
Email addresses are connected to your voicemails if you have voicemail-to-email enabled. You can add multiple email addresses if you need to send voicemails to different inboxes.
Email addresses are used for custom reports.
Your email is saved in net2phone Canada's database, so our client support teams can contact you if necessary.
How to Update your Sonar Email Address
Office managers and call center supervisors must be My Account of the Sonar portal to access Profile settings.
- Click your name in the upper right corner.
- Click Profile.
- Scroll down to find your email within the Account Security section, you can change your email address in the textbox next to Email Address(es).
- (Optional) To add secondary email address(es), click the green plus icon.

- Click Save before closing the pop-up menu.