Proper configuration is required to ensure high-quality voice communication over public IP links using Dell SonicWALL firewalls. This guide provides a tested method for prioritizing voice traffic on your network, ensuring optimal performance without compromising other WAN traffic.
Configurations are in old Versature branding and are valid for the net2phone Canada system.
Our team at Versature has thoroughly tested this configuration on SonicWALL firewalls running SonicOS Enhanced 5.9.x, specifically SonicOS Enhanced 5.9.1.4-4o. Other configurations have shown inconsistent performance and may lead to issues with both voice and non-voice traffic.
If you notice any inconsistency in network performance, review the bandwidth settings and firewall rules to ensure everything is properly configured.
Why Use Global Bandwidth Management (BWM)?
We recommend using SonicWALL's Global Bandwidth Management mode to prioritize voice traffic. Other modes may cause dropped packets or degraded voice quality due to firmware bugs in certain versions of SonicOS.
Requirements:
- Dell SonicWALL running SonicOS Enhanced 5.9.x (tested on 5.9.1.4-4o).
- Access to the SonicWALL firewall admin interface.
Configuration Overview:
- Configure Global Bandwidth Management (BWM).
- Set the interface ingress and egress speeds.
- Create Address Objects and an Address Group for voice traffic.
- Create a firewall rule to prioritize voice traffic.
Step 1: Configure Global Bandwidth Management (BWM)
Setting voice traffic to the highest priority guarantees bandwidth for VoIP traffic, even during heavy network usage.
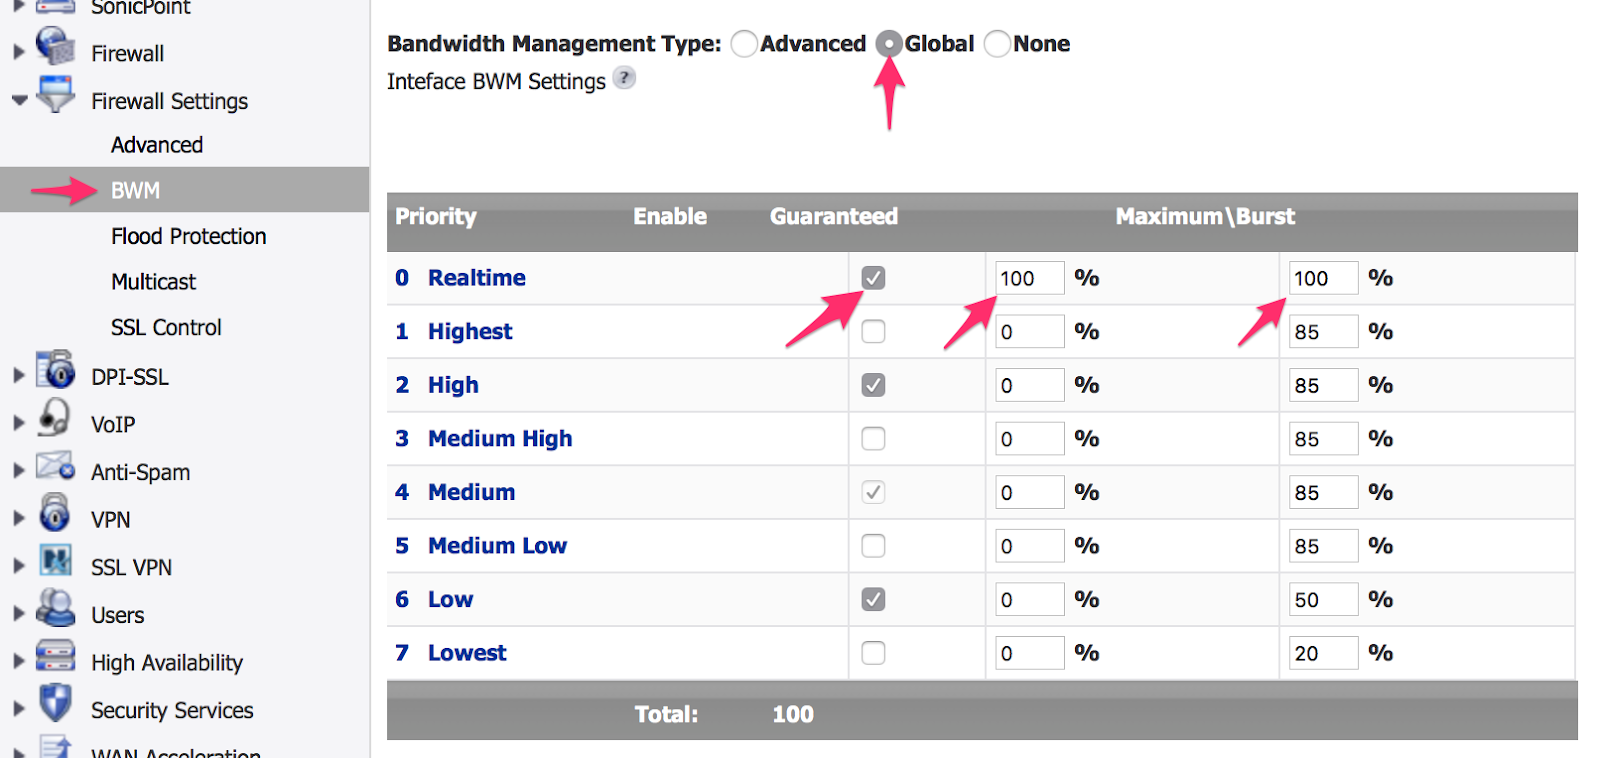
- Navigate to Firewall Settings.
- Select BWM and configure the following:
- Bandwidth Management Type: Set to Global.
- Realtime Priority Level: Check the box to enable this.
- Set Guaranteed Bandwidth to 100% and Maximum/Burst to 100% for Realtime. This ensures voice traffic can use the full available bandwidth.
- Set other priority levels (enabled) to 0% and 85%, respectively.
Step 2: Set Interface Speeds
If your ISP fluctuates in speed, you may need to reduce these values to ensure stability.
- Go to Network > Interfaces.
- Click the pencil icon next to your WAN interface to edit its settings.
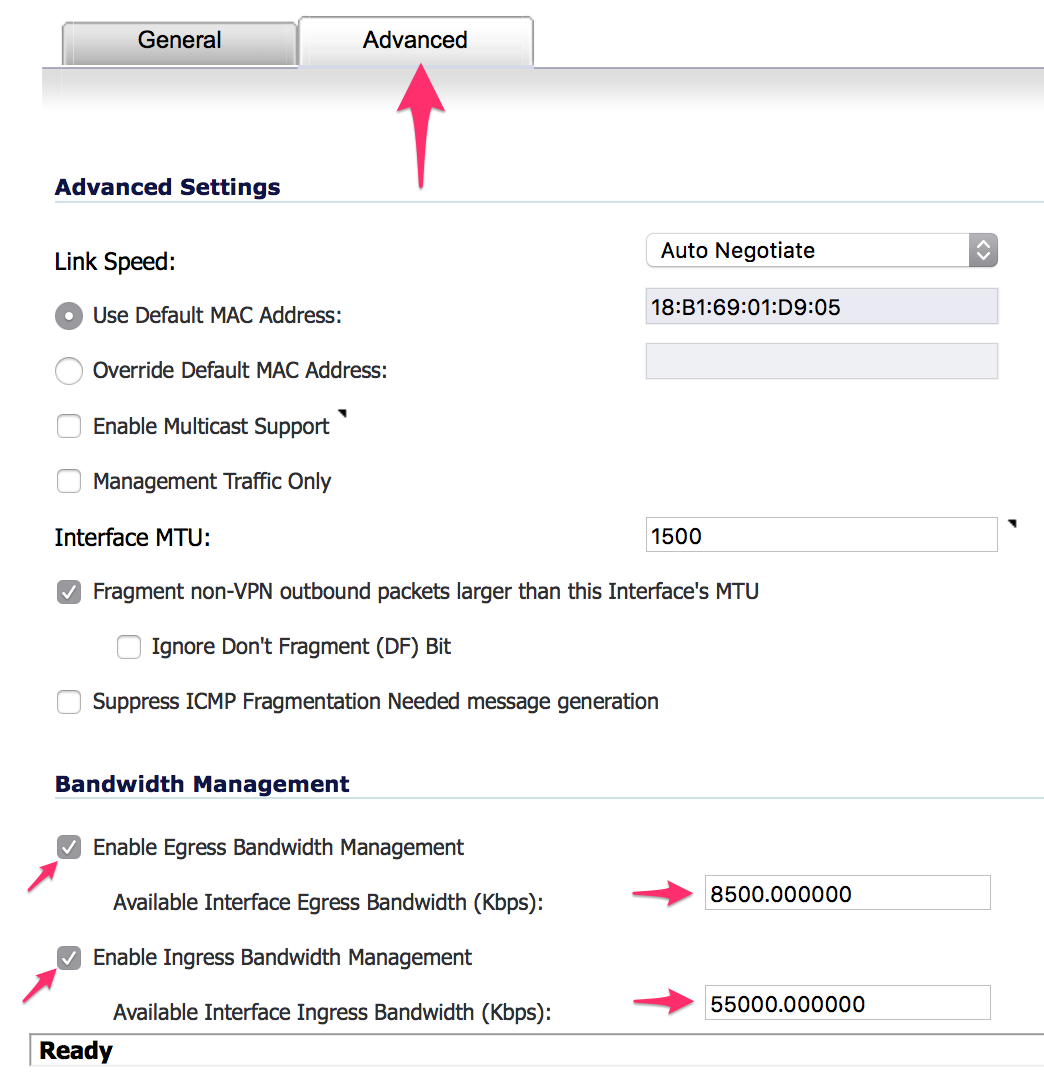
- In the Advanced tab:
- Enable Egress Bandwidth Management (upload) and Ingress Bandwidth Management (download).
- Set the Egress and Ingress speeds to the actual speeds provided by your ISP, minus 500 Kbps to allow for overhead.
- Use a tool like Speedtest to measure the speed by connecting a device directly to the WAN link, ensuring accuracy.
Step 3: Create Address Objects and Address Group
To ensure the firewall recognizes Versature’s voice traffic, you must create four Address Objects and combine them into an Address Group.
Create Address Objects
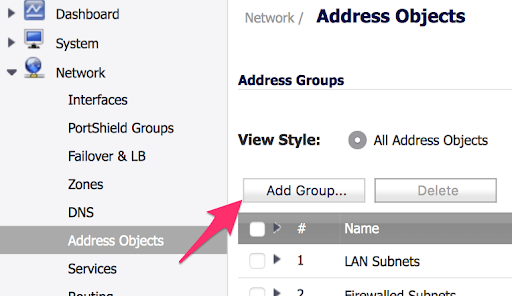
- Navigate to Network > Address Objects.

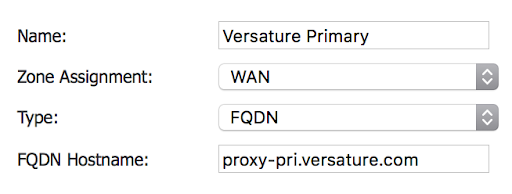
- Click Add to create new objects. Fill in the following details:
| Name | FQDN Hostname |
|---|---|
| Versature Primary | proxy-pri.versature.com |
| Versature Secondary | proxy-sec.versature.com |
| Versature Tertiary | proxy-ter.versature.com |
| Versature Quaternary | proxy-qua.versature.com |
Ensure that the Zone Assignment is set to WAN and Type is set to FQDN for all objects.
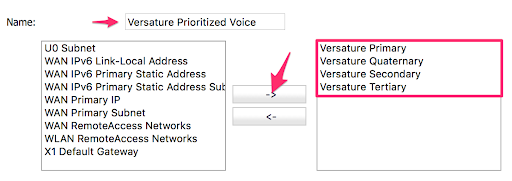
Create Address Group
- After creating the Address Objects, click Add Group.
- Name the group "Versature Prioritized Voice".
- Add the four Address Objects to the group using the right arrow.
Step 4: Create a Firewall Rule to Prioritize Voice Traffic
This rule ensures that net2phone Canada voice traffic is given the highest priority, preventing packet loss and improving call quality.
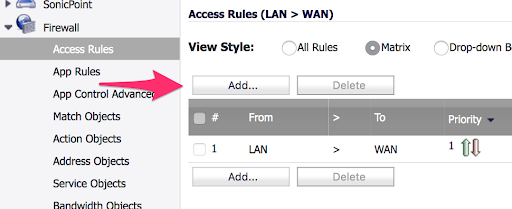
- Go to Firewall > Access Rules.
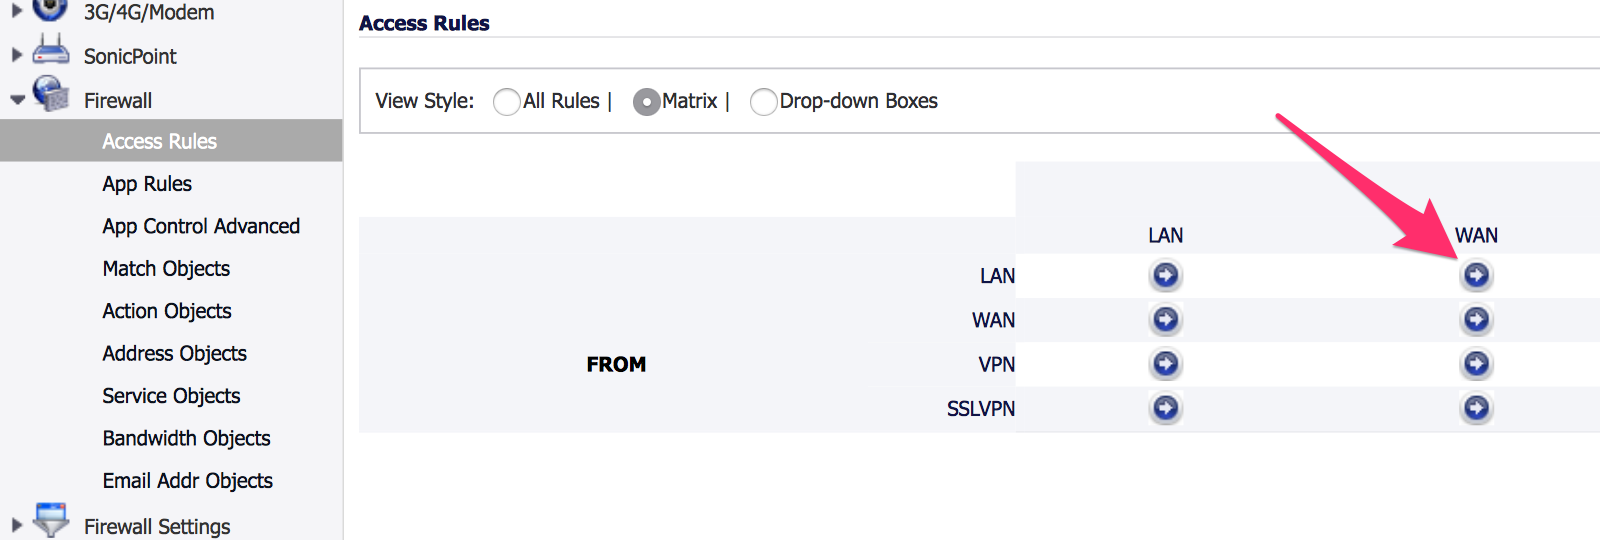
- In the to WAN rules section, click Add.
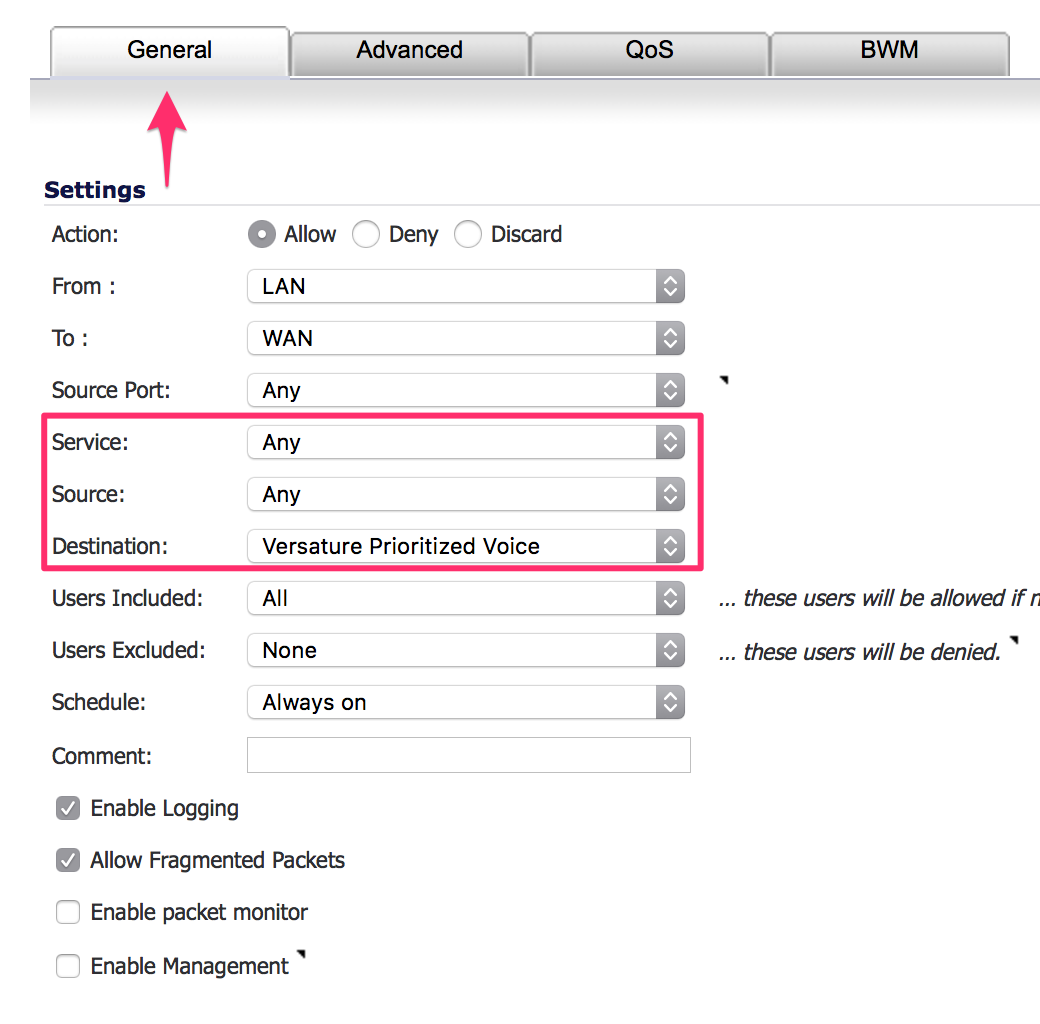
- In the General tab, configure the following:
- Service: Set to Any.
- Source: Set to Any.
-
Destination: Set to the newly created Versature Prioritized Voice Address Group.
4. In the BWM tab: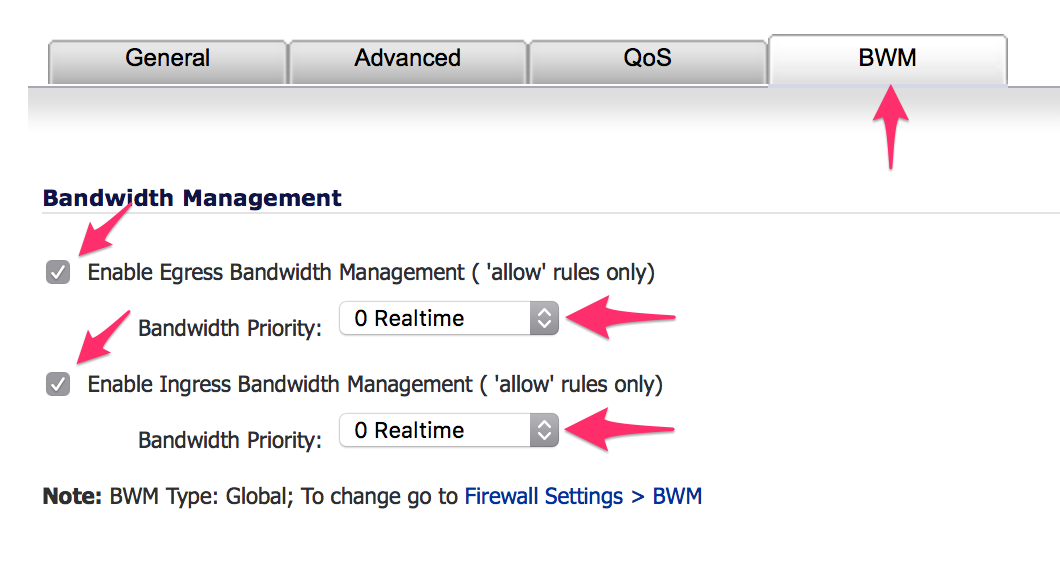
- Enable both Egress Bandwidth Management and Ingress Bandwidth Management.
- Set Bandwidth Priority for both to 0 Realtime.
Need Help? Contact Support!
For further assistance, contact net2phone Canada support:
- Dial 611 from any net2phone device.
- Call 1-877-498-3772, option #3.
- Email support@net2phone.ca with a call example (date, time, and Caller ID displayed).
