Within the Manage Organization view, the Call History section offers call data reports sent to your email.
How to Create a New Scheduled Call Data Report
If you do not see "Scheduled Exports" or "Export Billed Calls" in the Call History section, you are in My Account and can only view your personal call history. Learn how to switch between the different Sonar views and access.
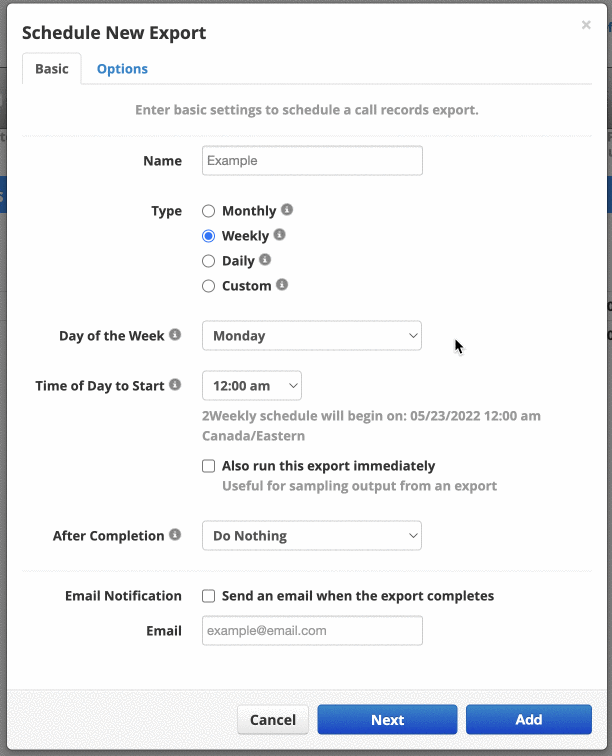
Enter Basic Information
Enter the required information within the first subtab of the popup configuration menu.
- Click Scheduled Exports.
- Click New Export.
- Enter the basic settings for the report, you will have slightly different options depending on the report type you choose:
- Name: Provide a unique name for the report.
- Type: Choose the frequency of the report (monthly, weekly, daily, or custom).
- For weekly reports: Select the Day of the Week.
- For daily reports: Select the Time of Day.
- For custom intervals: Set the Repeat Cycle.
- Choose an option for After Completion (do nothing, email attachment).
- Optional Settings:
- Select Also run this export immediately if needed.
-
Enable Email Notification and enter your email if you wish to receive notifications.
Configure Report Options
Enter the required information within the second subtab of the popup configuration menu.
- Click Next.
- Enter the configuration options for your exported report:
- User (leave blank to select all users)
- Include/exclude inbound calls
- Include/exclude outbound calls
- Include headers
- Off-net calls only (only calls to non-n2p Canada numbers)
-
Format (always set to Advanced)

Downloading your Exports
Once you have created a report, it will appear in the scheduled exports section. You can manage multiple reports here. The buttons on the right side allow you to edit, download, and delete reports, as shown in the image below.

