Creating a personal business voicemail greeting offers several benefits, enhancing your professional image and ensuring effective communication. Check out our blog: 10 Professional Voicemail Greetings for Your Business Needs, for ten script templates!
You can create a voicemail greeting in three ways:
- upload an existing .wav or .mp3 file,
- record a new greeting, and,
- use text-to-speech to generate a voicemail greeting.
Voicemail Greeting Tips!
Test your voicemail greeting by calling your own extension.
Keep it Concise
Aim for a greeting that is no longer than 20-30 seconds. Your greeting will only play once, so don’t speak too quickly and repeat any vital information that may need to be written down.
Be Clear and Direct
Clearly state your name, your business, and the purpose of the voicemail inbox.
Provide Instructions
Guide callers on what information to leave and what to expect in terms of response time.
Update Regularly
Ensure your voicemail greeting is up-to-date, especially if your availability changes frequently.
How To Upload A New Voicemail Greeting
Uploads must be in .mp3 or .wav format. Office Managers and Account Center Supervisors must be in My Account to access the Messages tab.
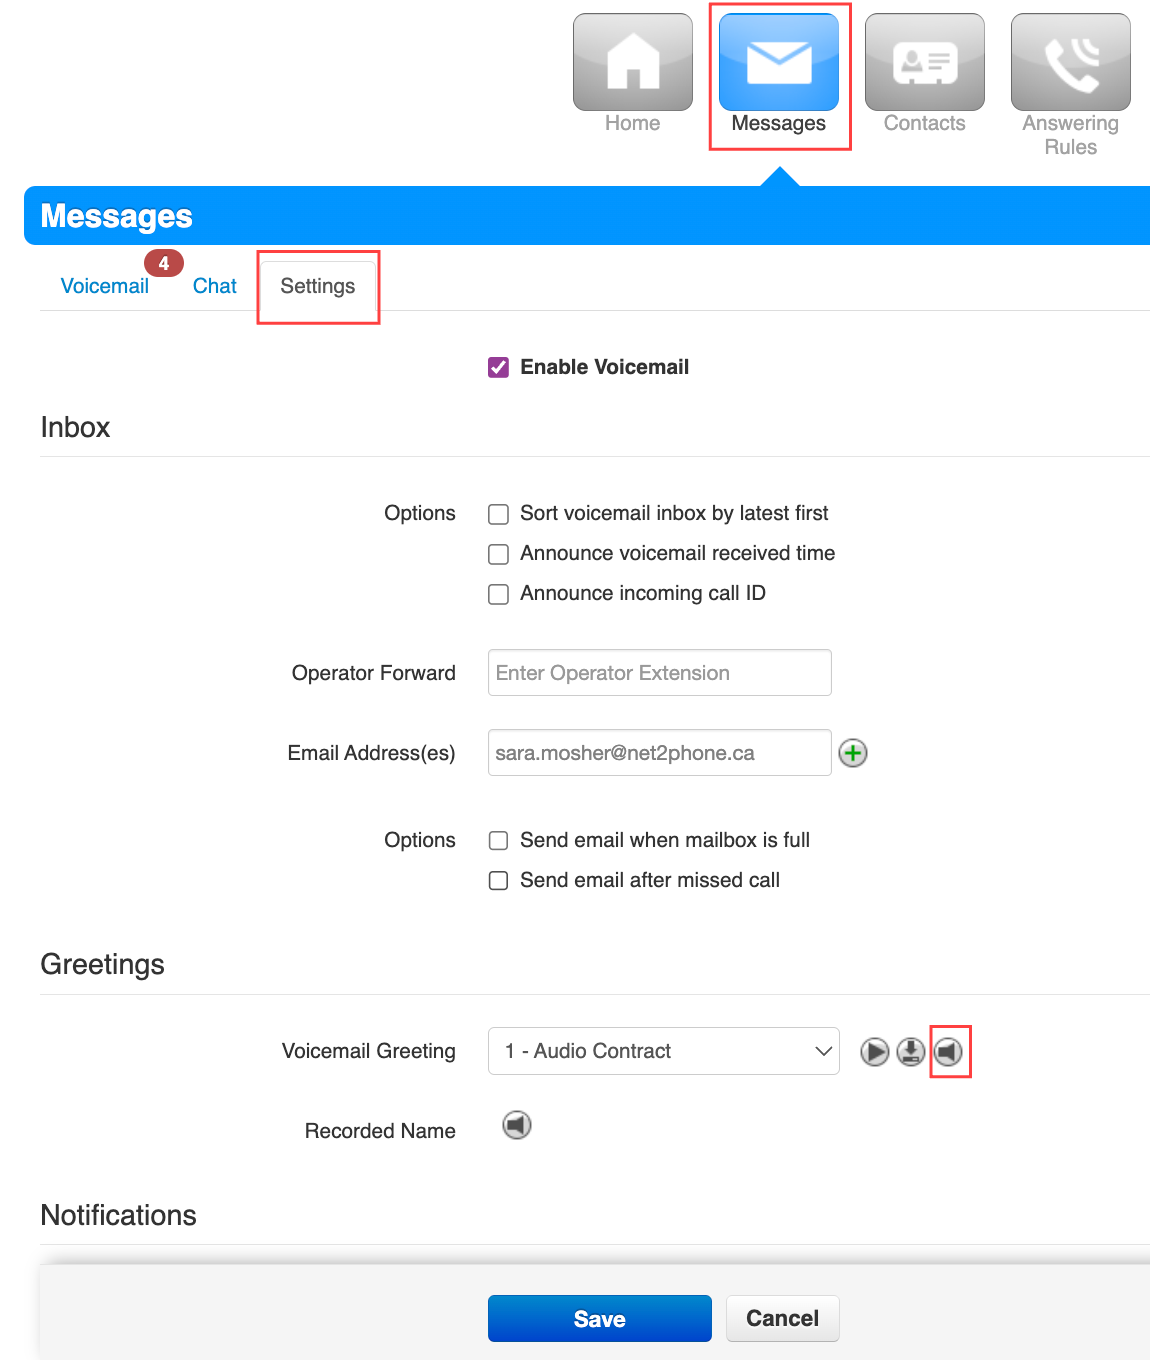
- Click the Messages tab in your Sonar portal.
- Click the Settings sub-tab on the left side.
- Scroll down to the Greetings section and click the speaker icon (manage) next to Voicemail Greeting.
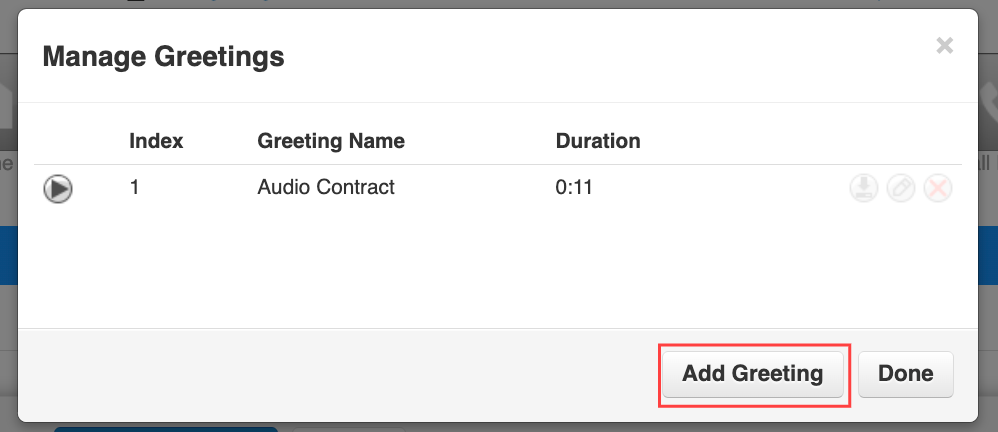
- Click Add Greeting.
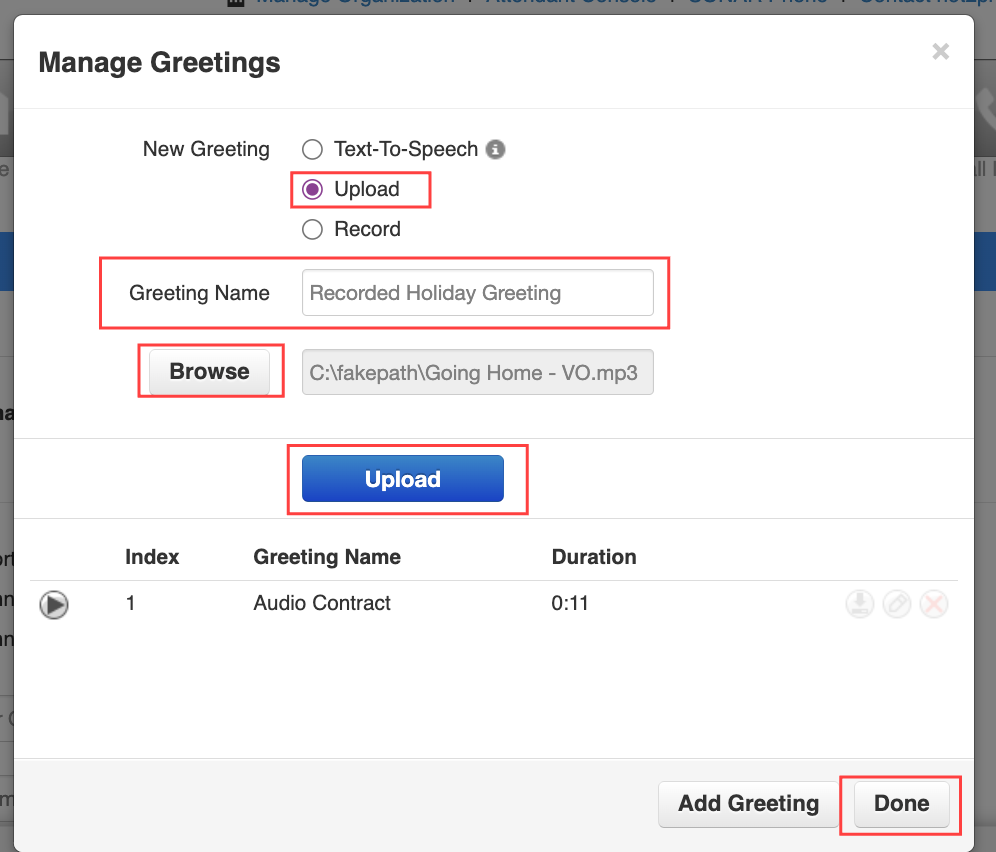
- Click the radio button for Upload.
- Name your greeting.
- Click Browse.
- Select the file you want to upload.
- Click the Upload button.
You will now see the new greeting’s index, greeting name, and duration in your greetings list. - Click Done to save.
Activate your voicemail greeting!
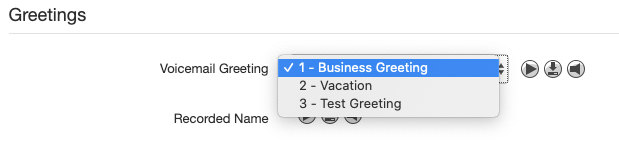
If you want to activate your new greeting, in the Messages, Settings section, under Greetings, click the drop-down menu and select your new greeting.
How To Record A New Voicemail Greeting
Keep in mind that recording a message using a third-party device (such as a mobile phone) may degrade the quality. Office Managers and Account Center Supervisors must be in My Account to access the Messages tab.
- Click the Messages tab in your Sonar portal.
- Click Settings on the left side.
- Scroll down to the “Greetings” section and click the speaker icon (manage) next to Voicemail Greeting.
- Click Add Greeting.
- Select the Record radio button.
- Enter the number or extension of the phone you wish to record the greeting on.
Note: If you have multiple devices, you must specify which device to call; the letters following your extension indicate the device, i.e., 101wb for the webphone/Sonar phone or 101m for the mobile app. - Name the greeting.
- Click Call and follow the instructions given to you on the phone.
- Record your message after the beep.
- Hit # to accept your new greeting.
You will now see the new greeting’s index, greeting name, and duration in your greetings list.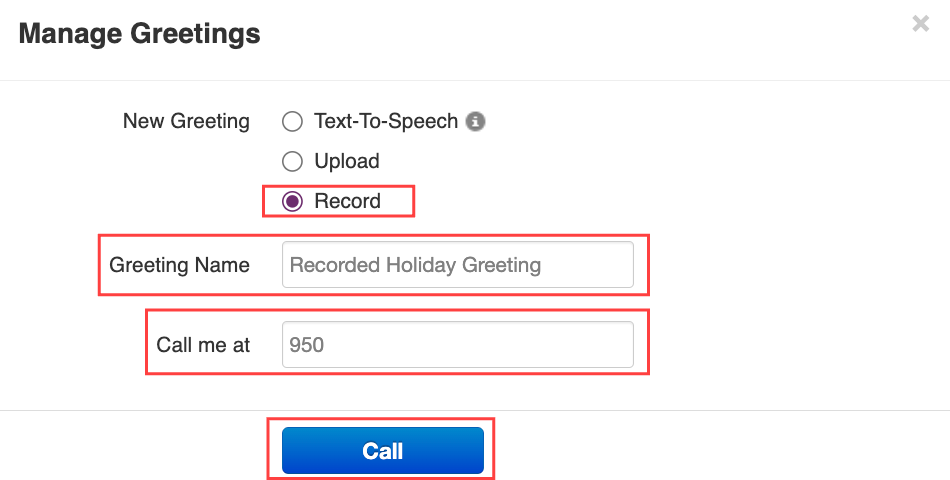
- When you are finished, click Done to save.

Activate your voicemail greeting!
If you want to activate your new greeting, in the Messages, Settings section, under Greetings, click the drop-down menu and select your new greeting.
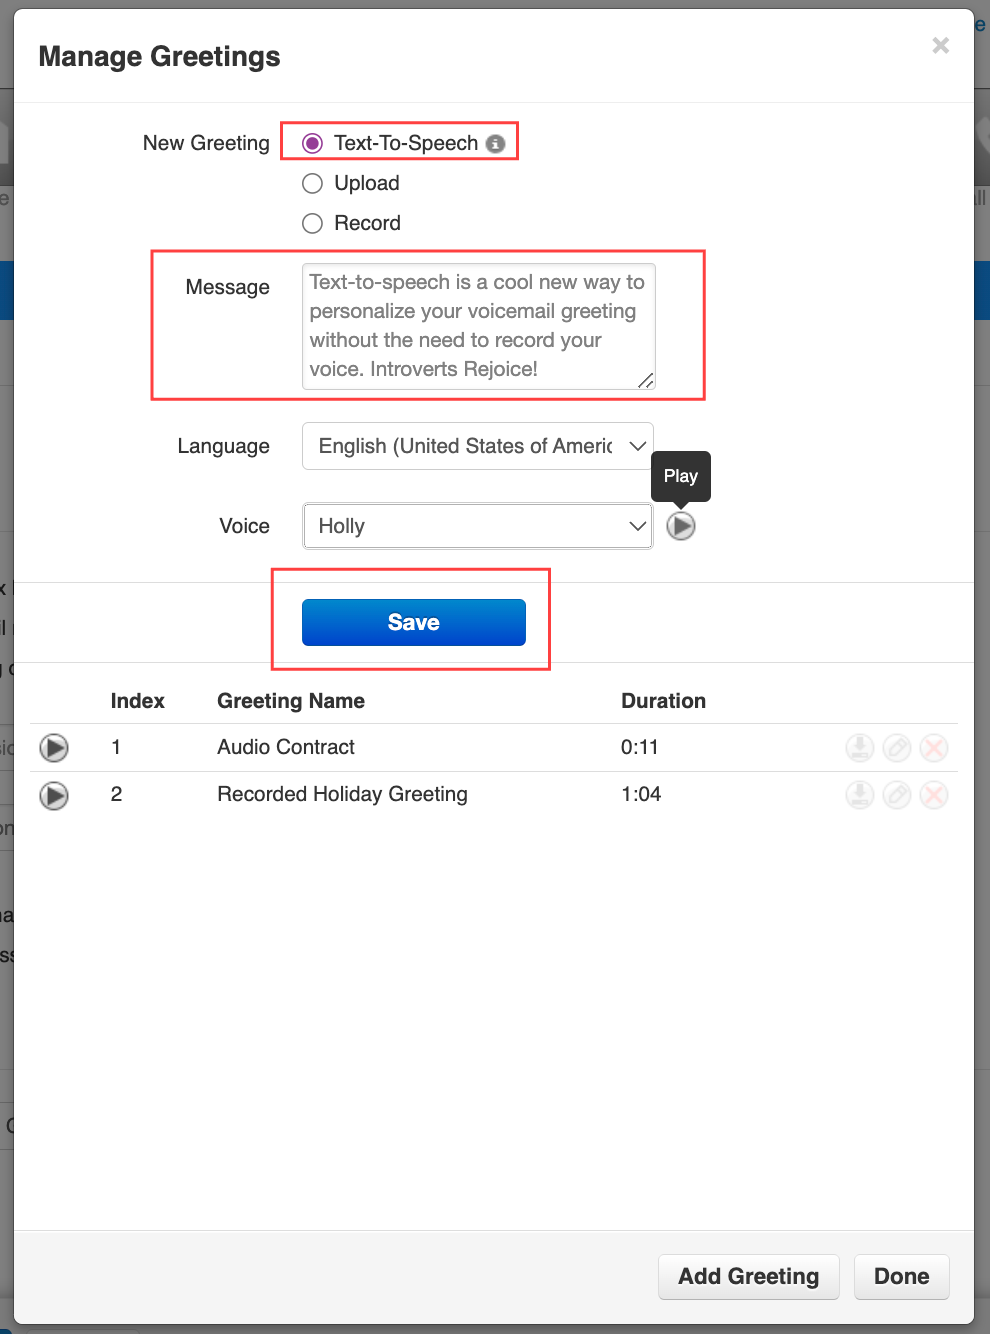
How to use Text-To-Speech for Voicemail Greetings
Sonar offers several generated voice options. Office Managers and Account Center Supervisors must be in My Account to access the Messages tab. Please refer to the images above for steps 1-4.
- Click the Messages tab in your Sonar portal.
- Click Settings on the left side.
- Scroll down to the “Greetings” section and click the speaker icon (manage) next to Voicemail Greeting.
- Click Add Greeting.
- Click the radio button for Text-to-Speech.
- Enter your message, choose English or French, and your preferred voice.
- Click the play button beside the Voice drop-down menu to hear the message.
-
Click Save after reviewing your text.
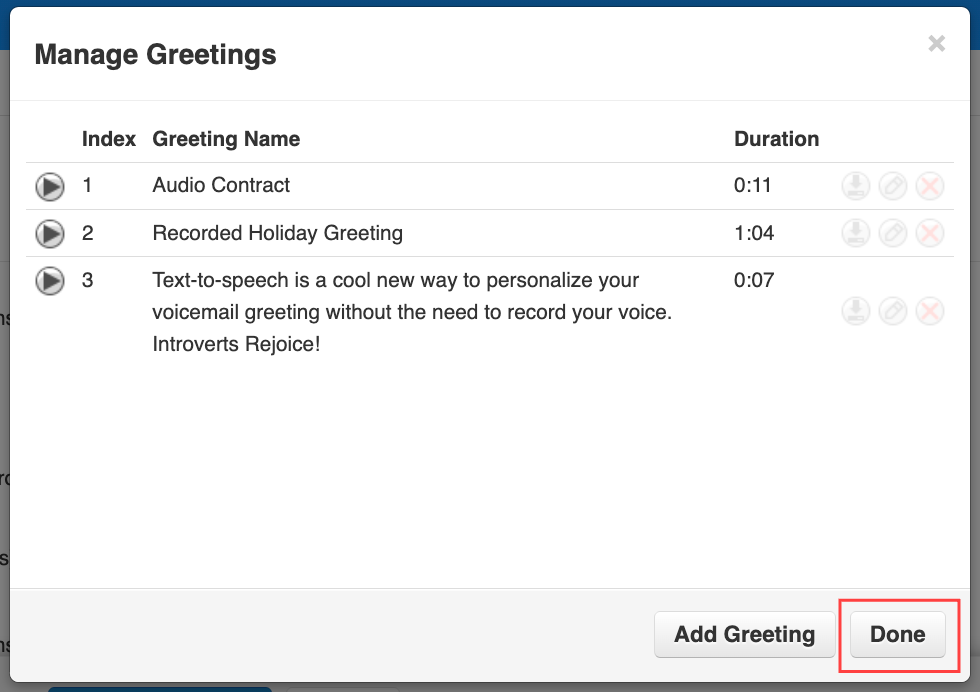
- When you are finished, click Done to save.
Activate your voicemail greeting!
If you want to activate your new greeting, in the Messages, Settings section, under Greetings, click the drop-down menu and select your new greeting.
