Time Frames Overview

You can locate the Time Frames section in the tab bar of your Sonar portal. Times frames allow you to choose what happens based on a date range, or a time. There are three types of time frames you can choose from in addition to your default time frame:

  • Always
  • Days of the week and times
  • Specific dates and ranges

Once a time frame is created, you cannot edit the name. Aim to name your time frames, so they are easily recognizable when you are creating answering rules.

Notes for All Users 

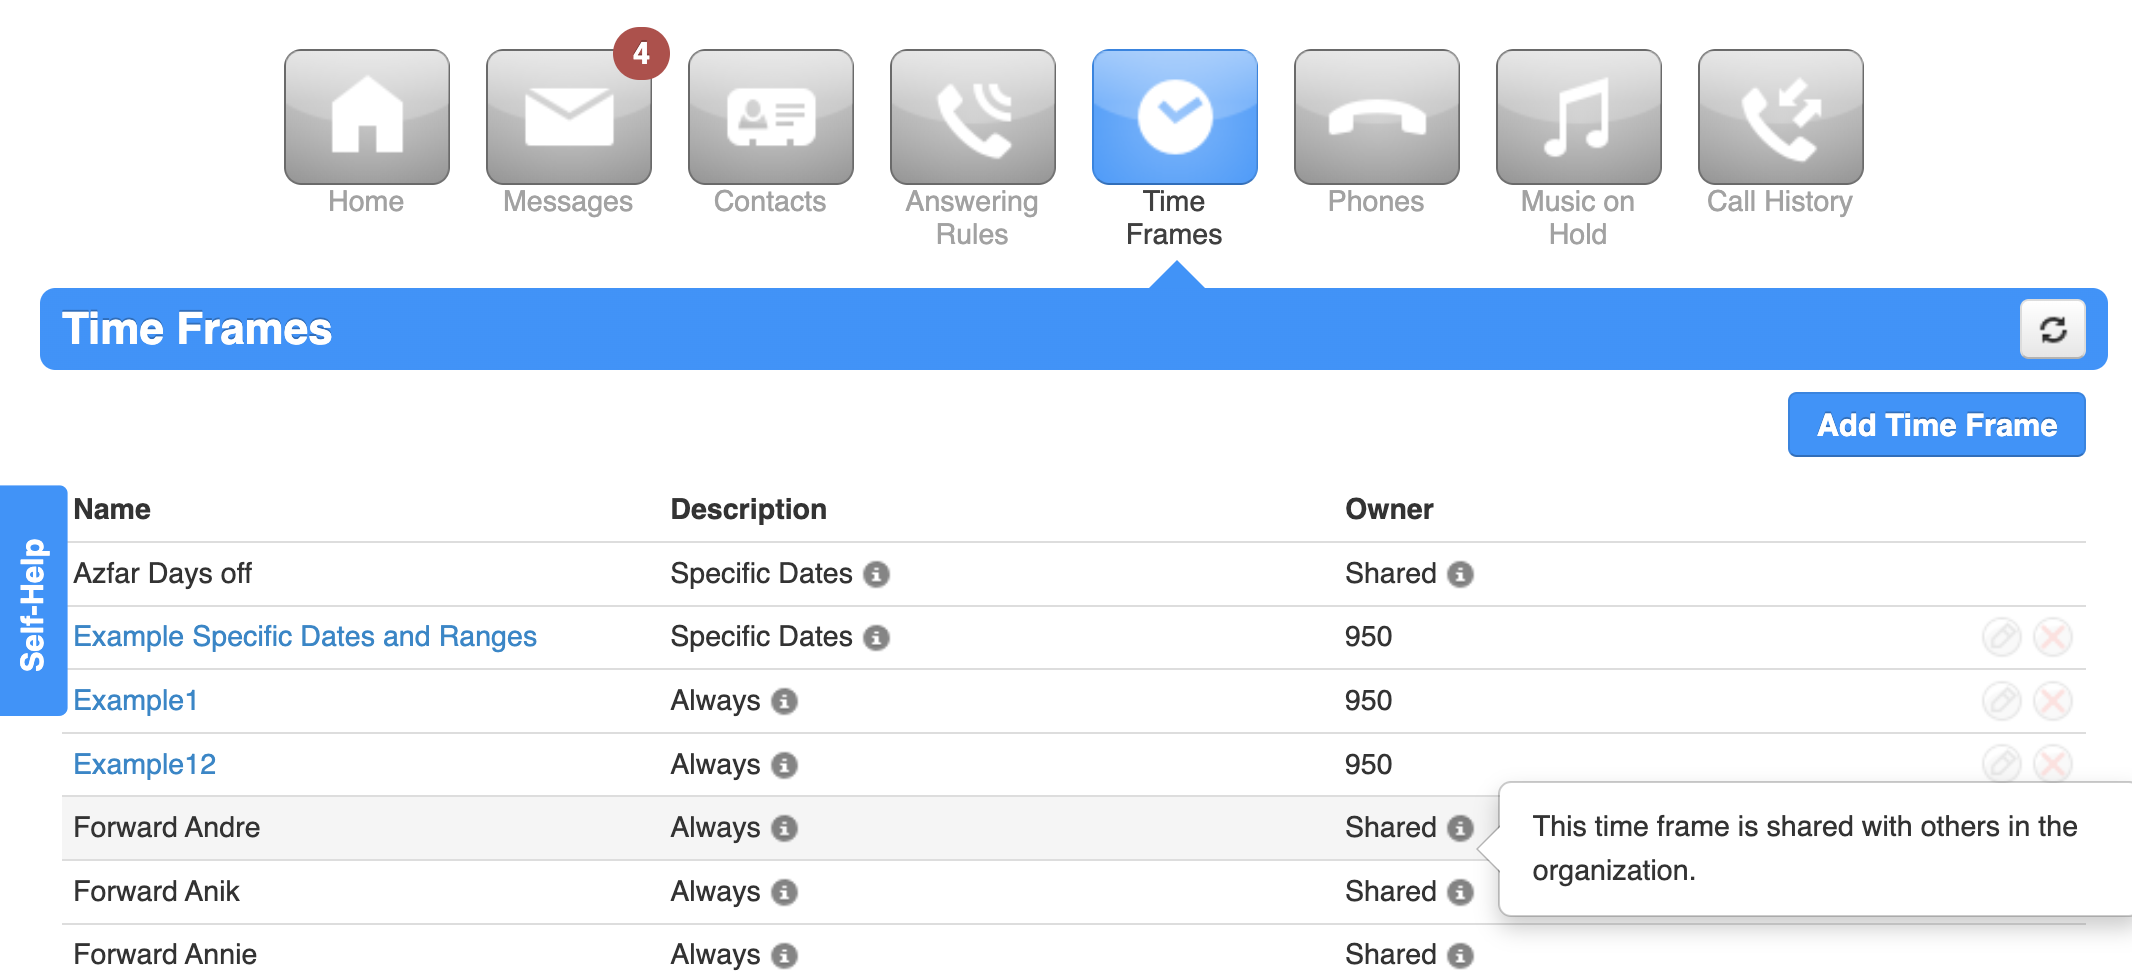
There are two types of time frames, (1) shared and (2) private, which are identified in the Owner column.

Private time frames are personalized time frames created by an individual user and linked only to the user’s extension number.

Private time frames are only visible to the user who created them.

Basic users and Call Center Agents cannot edit shared time frames.

Notes for Office Managers and Call Center Supervisors 

Office managers and call center supervisors have to be in My Account to access their personal time frames list.

Office managers are the only users that can create shared time frames. 

Shared time frames automatically become visible for all users in your organization.


The Default Time Frame 

The default time frame becomes active whenever you do not have a time frame currently in place. For example, if you set a work-week time frame to be 9:00 a.m. to 5:00 p.m. from Monday to Friday, your default time frame becomes active during the week from  5:01 p.m. to 8:59 a.m. the next day, and all day during the weekend. When setting answering rules, it is essential to remember that if there is no time frame in place, the default message will be played.

Create a New Time Frame

Time frames are the foundation of call-answering customization. When used in conj...

Time frames are the foundation of call-answering customization. When used in conjunction with Answering Rules, you can choose how your phones are answered based on a specific date range, day, and time.     

The 3 Sonar Time-Frame Types 

Always – select whenever you need an action to be performed for an indefinite amount of time.

Days of week and times – select whenever you need different behaviors for different times, such as “After Business Hours.”

Specific days or range – select whenever you need a special behavior for full days such as holidays or sick leave.


How to Create a New Time Frame 

Office Managers and Call Center Supervisors must be in My Account to access the Time Frames tab. 

  1. Click the Time Frames tab in your Sonar portal.
  2. Click Add Time Frame in the right corner.
  3. Name your new time frame so you can find it in the future.
  4. Select the type of time frame you want to set.

For Always

Select Always whenever you need an action to be performed for an indefinite amount of time.

  1. Click the Always radio button.
  2. Click Save.

For Days of the Week and Times

Select Days of the Week and Times whenever you need different behaviors for different times, such as “After Business Hours.”

  1. Click the Days of the Week and Times radio button.
  2. On the left side, click the checkboxes of the days you wish to include in your time frame.
  3.  For each of the selected days, use the horizontal sliders to manually set the time periods you wish to include in your time frame. Whatever is in blue will be included in this time frame.
  4.  Click Save.

The Default Time Frame 

The default time frame (after hours) will be active whenever you do not have a time frame in place. The times that are left unselected will default to your organization's after-hours time frame. In the example above, the default time frame is activated for an extended lunch on Monday and Tuesday.


For Specific Dates and Ranges

Select Specific days or ranges whenever you need a special behavior for full days such as holidays or sick leave.

  1. Click the calendar icon and select your time frame's start and end dates.
  2.  If you wish to add multiple start and end dates, click the green plus icon on the right side.
  3.  Click the Save button.

Time Frame Pro Tips! 

Remember, creating a time frame is only half the battle—don’t forget to create an answering rule afterward that makes use of your time frame.

Never miss a call by redirecting calls to your mobile phone in case you have an internet outage using net2phone Canada SureAnswer, or get the net2phone Canada iOS mobile app.

Forwarding calls from the office to a personal number? Utilize net2phone Canada SmartAnswer to remove the hazard of mis-answering. 

Have a holiday coming up? Use your new time frame with an Answering Rule to send calls straight to voicemail and record a greeting informing callers you’re away.

Set a time frame to have all calls go straight to voicemails when you leave for the day.

Learn how to adjust the amount of rings on your phone before timeout. 


Common Answering Rules and Time Frame Use Cases

Time Stamps 

0:00 Intro 

0:15 Default Time Frame 

0:30 Scenario 1 - Holiday and Vacation (OOO) 

1:35 Scenario 2 - Doctors Office 

2:50 Scenario 3  - Landscaping Employee 

3:35 Contact Support for Help

If you are having difficulty creating your customized time frame/answering rule, for immediate assistance you can contact our Technical Support Team by dialing 611 from your net2phone Canada device or by calling 1-877-498-3772 and choosing option #3. Emails will be responded to within 1 business day and can be sent to support@net2phone.ca


Was this article helpful?

Can’t find what you’re looking for?

Our award-winning customer support team is here for you.

Contact Support