Within the Users tab, you can easily access all of the people in your company on the Sonar portal. Users display in this section by name, extension number, and department.
What is a Sonar User?
Users are the extensions on your system; system users are users associated with queues, auto attendants, and other system features.
Hide System Users: this checkbox at the bottom of the page allows you to easily filter out all call queues, auto attendants, and other VoIP system extensions, so you can easily view individual users; basic users, call center agents, supervisors, or other office managers.

How to Access Your Organization's Users
Find all your users within the User's tab.
- Log into Sonar with Office Manager Credentials.
You will be automatically redirected to the Manage Organization view of your Sonar portal. - Click the Users tab.

Interactive User List
From the main users page, you will find an interactive table. By default, the following columns are displayed, from right to left:
Find a User by Search
Use the search box to enter a user's name or extension number.
Extension
The user's extension number.
Department
If the user is assigned to a department, it will be listed here. Departments can be helpful when organizing users in a larger organization.
Site
If your organization has multiple locations, their assigned work site will be listed.
Scope
The scope of users' Sonar portal access will significantly change. Learn more about the differences between Office Manager Sonar Access.
Email
The user's designated Sonar email address will be listed.
Record
You can access their short-term recordings here if the user has enabled call recording enabled.
Edit Button
Click this pencil icon button to edit a user:
- profile information,
- answering rules,
- voicemail settings, and,
- password reset options.

By clicking the Table Settings drop-down menu, you can choose also to display the following column fields:
Caller ID
The caller ID will be your organization's main number for most users.
Emergency Caller ID
The emergency Caller ID may or may not be the same as your organization's main number. Learn more about e911 for New Users, and how to Keep your 911 Addresses Updated in Sonar.
Area Code
Displays the area code the user has implemented for their outbound calls. Learn more about Local Calling and how to change your Outbound Caller ID .
Dial Plan
The dial plan will reference your organization's domain name for the net2phone Canada system.
Dial Permission
Easily view which users have outbound permissions:
- Permit All,
- Deny All,
- Internal Only, and,
- Deny International.
Status (Message)
View a user's current availability status. Learn how to Use a Custom Call Center Status in Sonar.
Timezone
View a user's configured timezone, which may be different from their area code if your organization implements local calling.
Edit a User's Profile Information
As an Office Manager, you have the ability to update any user’s profile information.
Office Manager Access: Profile Changes
Most of the information within a user's profile can be updated by the user. There are a few exceptions that can only be edited by Office Managers or net2phone Canada Support.
Login name
Login names are always entered as emails.
Department
Department assignment is optional.
Overwrite with Site Defaults
If your organization has multiple locations (sites), you can override their settings to match a specific Site's configurations.
User Scope
You can update a user's scope with one of three options: Basic User, Call Center Agent, or Call Center Supervisor. You cannot demote another Office Manager or promote a user to Office Manager status without net2phone Canada Support.
Directory Options
Choose to enable or disable Announce in Audio Directory and List in Directory.
Caller ID Information
If your organization has multiple locations, ensure that users are assigned the correct outbound Caller ID number.
Tips for Effective User Management
Learn how to leverage Sonar portal features for effective management.
Single Login for All Integrations
Your Sonar login and password are used with all of net2phone Canada’s integrations, including the net2phone Canada iOS App and the Dialer Chrome extension. Learn how to Simplify Your Login with Sonar Single Sign-On (SSO).
Empower Users
Encourage users to update their own information as necessary. Basic users can utilize this Profile Overview to understand what personal settings they can change.
Local Caller ID
Change your caller ID to make your calls appear local. Office Managers can learn how to configure Local Calling: Change your Outbound Caller ID.
Password or PIN Reset
If someone forgets their password or PIN, it can be reset by an office manager or net2phone Canada's Support Team. Learn how to recover Forgotten your Sonar Passwords.
How to Edit a User’s Profile
As an Office Manager, you have the ability to update any user’s profile information. You must be in Manage Organization to access the Users tab.
- Click on the Users tab.
- Find the username of the user that you would like to update and click on their name or the pencil icon to edit.
You can search for a user by extension or name.
- Within the user's configuration page, Profile settings are automatically opened within the first subtab; update or change any information in the user’s profile. Always ensure their email address is correct.
- Click Save.

Reboot the user's phone.
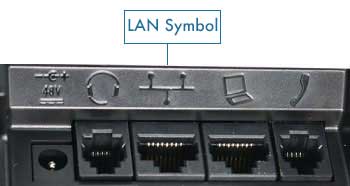
For changes to take effect, a desk phone must be rebooted. To reboot your phone, unplug the ethernet cable and plug it back in, ensuring you plug it back into the LAN port.
Need Assistance?
Contact our Technical Support Team by:
- Dialling 611 from any net2phone Canada device.
- Calling 1-877-498-3772 and choosing option #3.
- Emailing support@net2phone.ca (emails will be responded to within 1 business day).
Update a User's Answering Rules
As an Office Manager, you can update the answering rules for any user. It's best practice to send calls straight to voicemail when someone is out of the office.
How to Update User Answering Rules
As an Office Manager, you have the ability to update any user’s answering rule information. You must be in Manage Organization to access the Users tab.
Need a New Answering Rule?
The steps below detail how to prioritize answering rules for a user. If they do not have an out-of-office answering rule, learn how to Send Calls to Voicemail with a Do-Not-Disturb Answering Rule.
- Click on the Users tab.
- Find the username of the user that you would like to update and click on their name or the pencil icon to edit.
You can search for a user by extension or name.
- In the user's configuration page, click the second subtab to open Answering Rules.
- If the user already has an out-of-office answering rule, use the arrows on the left to drag-and-drop a rule to the top of the list to change priority.

- Click Save before navigating away from this page.
Update a User's Voicemail Greeting
As an Office Manager, you can update the voicemail settings for any user. Sometimes employees need to call in sick at the last minute or leave early due to an emergency.
How to Update a User's Voicemail Greeting
As an Office Manager, you have the ability to update any user’s information. You must be in Manage Organization to access the Users tab.
- Click on the Users tab.
- Find the user’s name that you would like to update and click on their name, or the pencil icon to edit.
You can search for a user by extension or name.
- In the user's configuration page, click the third subtab to open Voicemail settings.
- (Optional) To add a new Voicemail Greeting, click the speaker icon under the Greeting section to manage recordings. Learn how to Create a New Voicemail Greeting.
- (Optional) Enable Operator Forward. Learn how to Leave a Voicemail or Press Zero for Operator Forward

- Click the drop-down menu and select the voicemail greeting.
If the user has multiple greetings they will be displayed in this list. - Click Save before leaving the page.

Send New Welcome Emails for Account Setup
As an Office Manager, you can choose to send a new welcome email to an individual user or bulk send welcome emails to multiple users.
Send a new welcome email to an individual
You must be an Office Manager to send welcome emails.
- Navigate to the Manage Organization view of the Sonar portal.

- Click the Users tab.

- Search the user by name or extension number.
- Navigate to the Advanced settings subtab for the user by either:
- clicking the pencil icon next to the user's name, and then selecting Advanced from the drop-down menu, or,
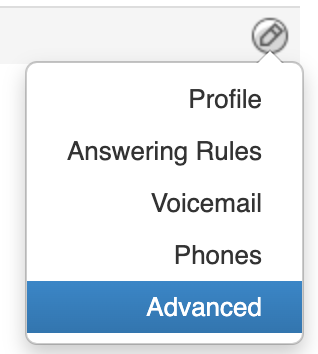
- clicking on the user's name, and then selecting the Advanced subtab.
- clicking the pencil icon next to the user's name, and then selecting Advanced from the drop-down menu, or,
- Under the "User Setup" section, click Send Welcome Email.

Receipts will have 24 hours to complete the setup before the link expires.

Bulk Send Welcome Emails to Multiple Users
You must be an Office Manager to send welcome emails.
- Follow steps 1 and 2 above to navigate to the Users tab.
- Within the user list, click the checkmark box next to the names of the new welcome email users.
Note: you can select all users by clicking the checkmark next to "Name" at the top of the list. - When you're finished selecting users, click the Bulk Action in the top right corner.
- Click the radio button next to Send Welcome Email.
- Click Complete Action. to finalize the process.
Receipts will have 24 hours to complete the setup before the link expires.
Reset a User's Password
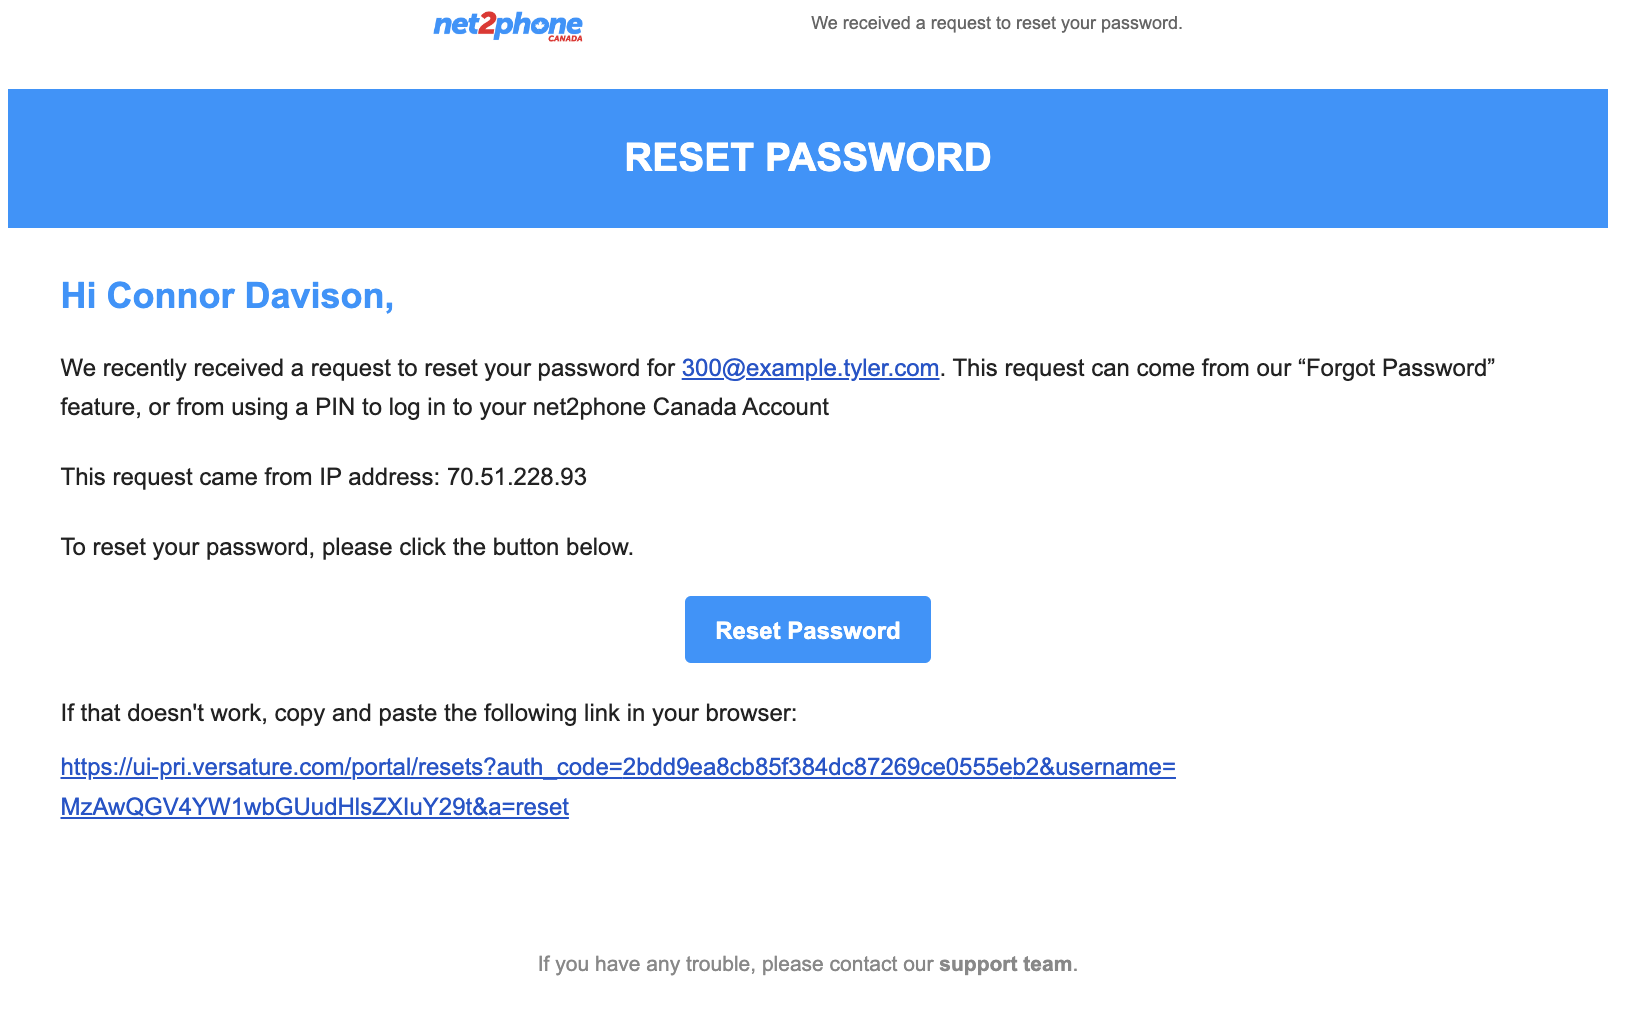
If a user forgets their password, they can go through the "Forgot Login or Password" process, or you can "Force Password Reset" and send a recovery email.
There are two methods of forcing password resets.
- Send to an individual user.
- Send bulk to multiple users.
How to Force Reset a User's Password
You must be in Manage Organization to access the Users tab.
- Log in to the Sonar portal with Office Manager credentials.
- Navigate to the Users tab.
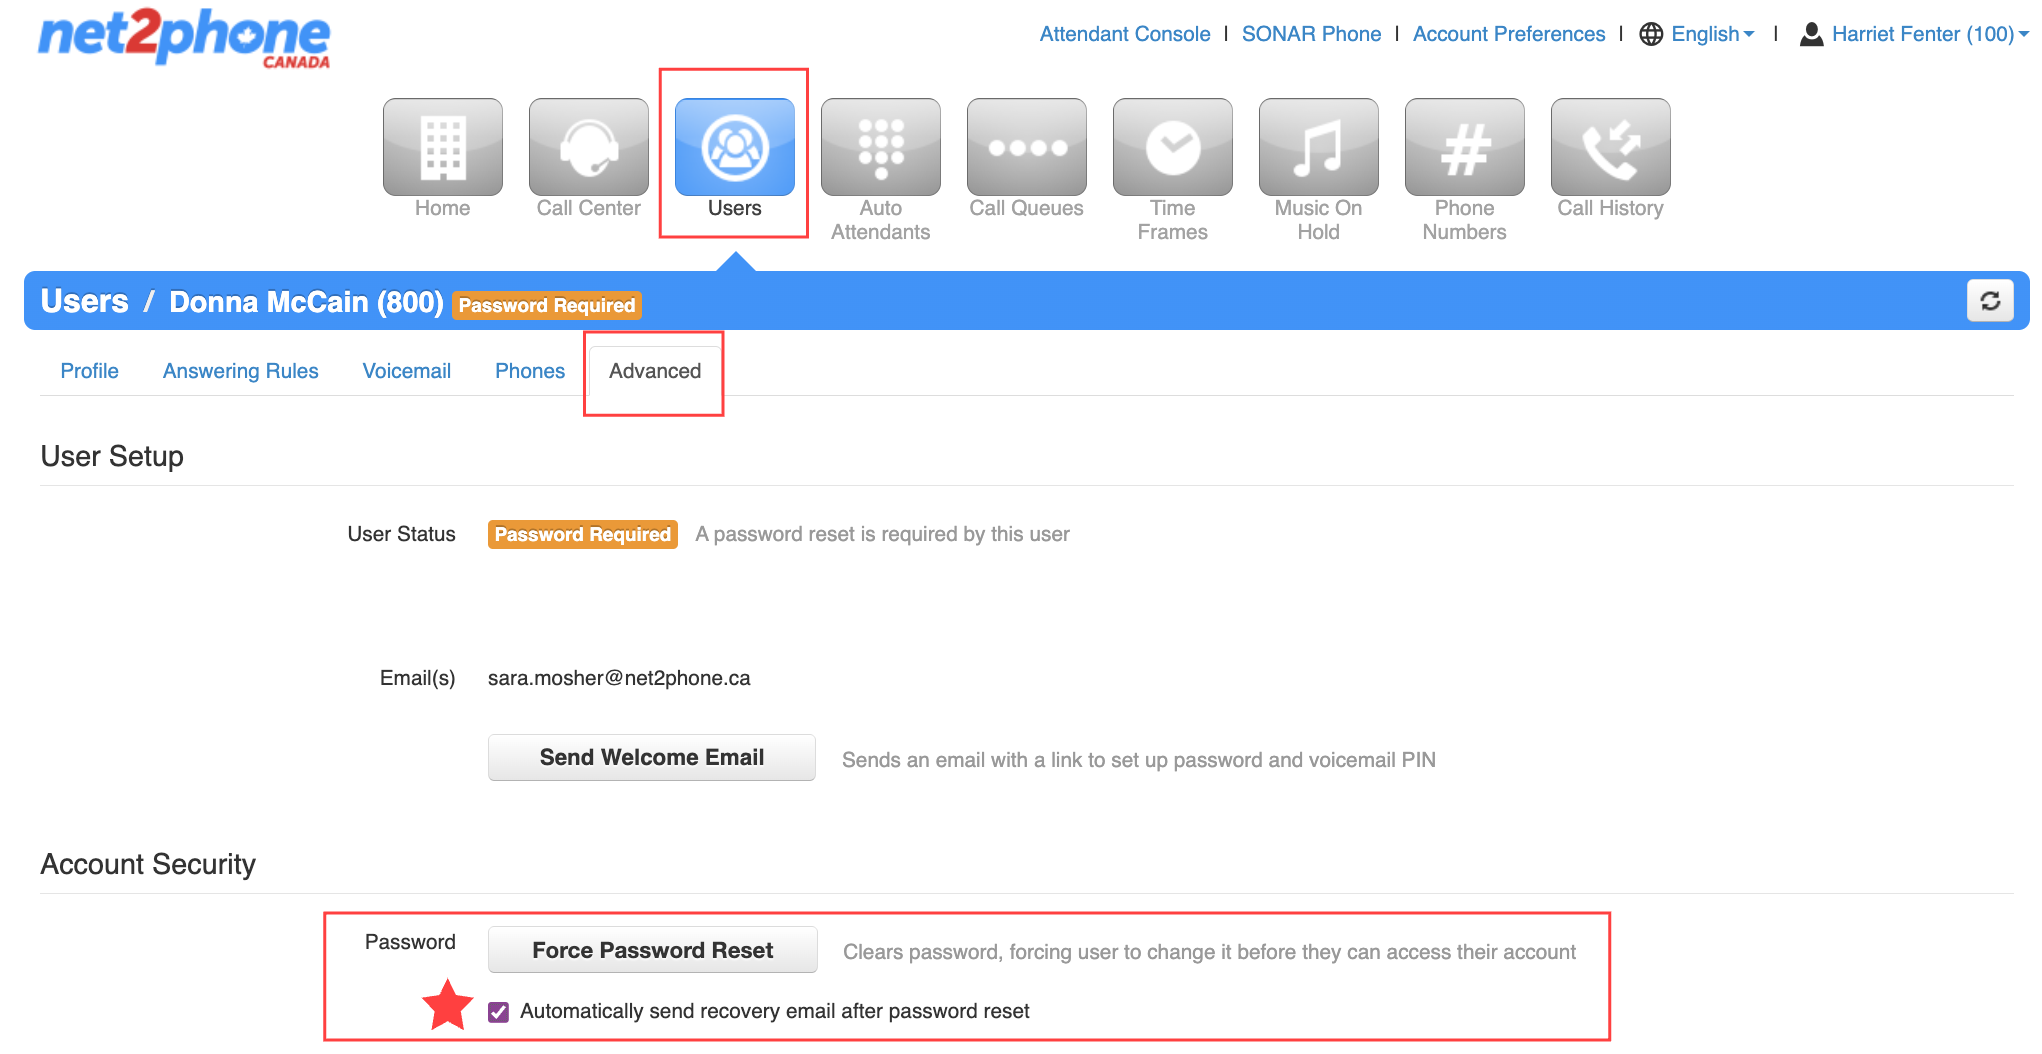
- Find the user by scrolling or using the search (name, extension number, or department) and click on the user's name or the pencil icon to edit,
- Click the Advanced subtab.
- Click Force Password Reset.
How to Send Bulk Password Resets to Multiple Users
You must be in Manage Organization to access the Users tab.
- Click the Users tab.
- Scroll through the user list and check the box next to each user who needs a password reset.
Pro Tip! Select All Users by clicking the checkmark box next to "Name" at the top of the list. - When all the users are selected, click the Bulk Action in the top right corner.
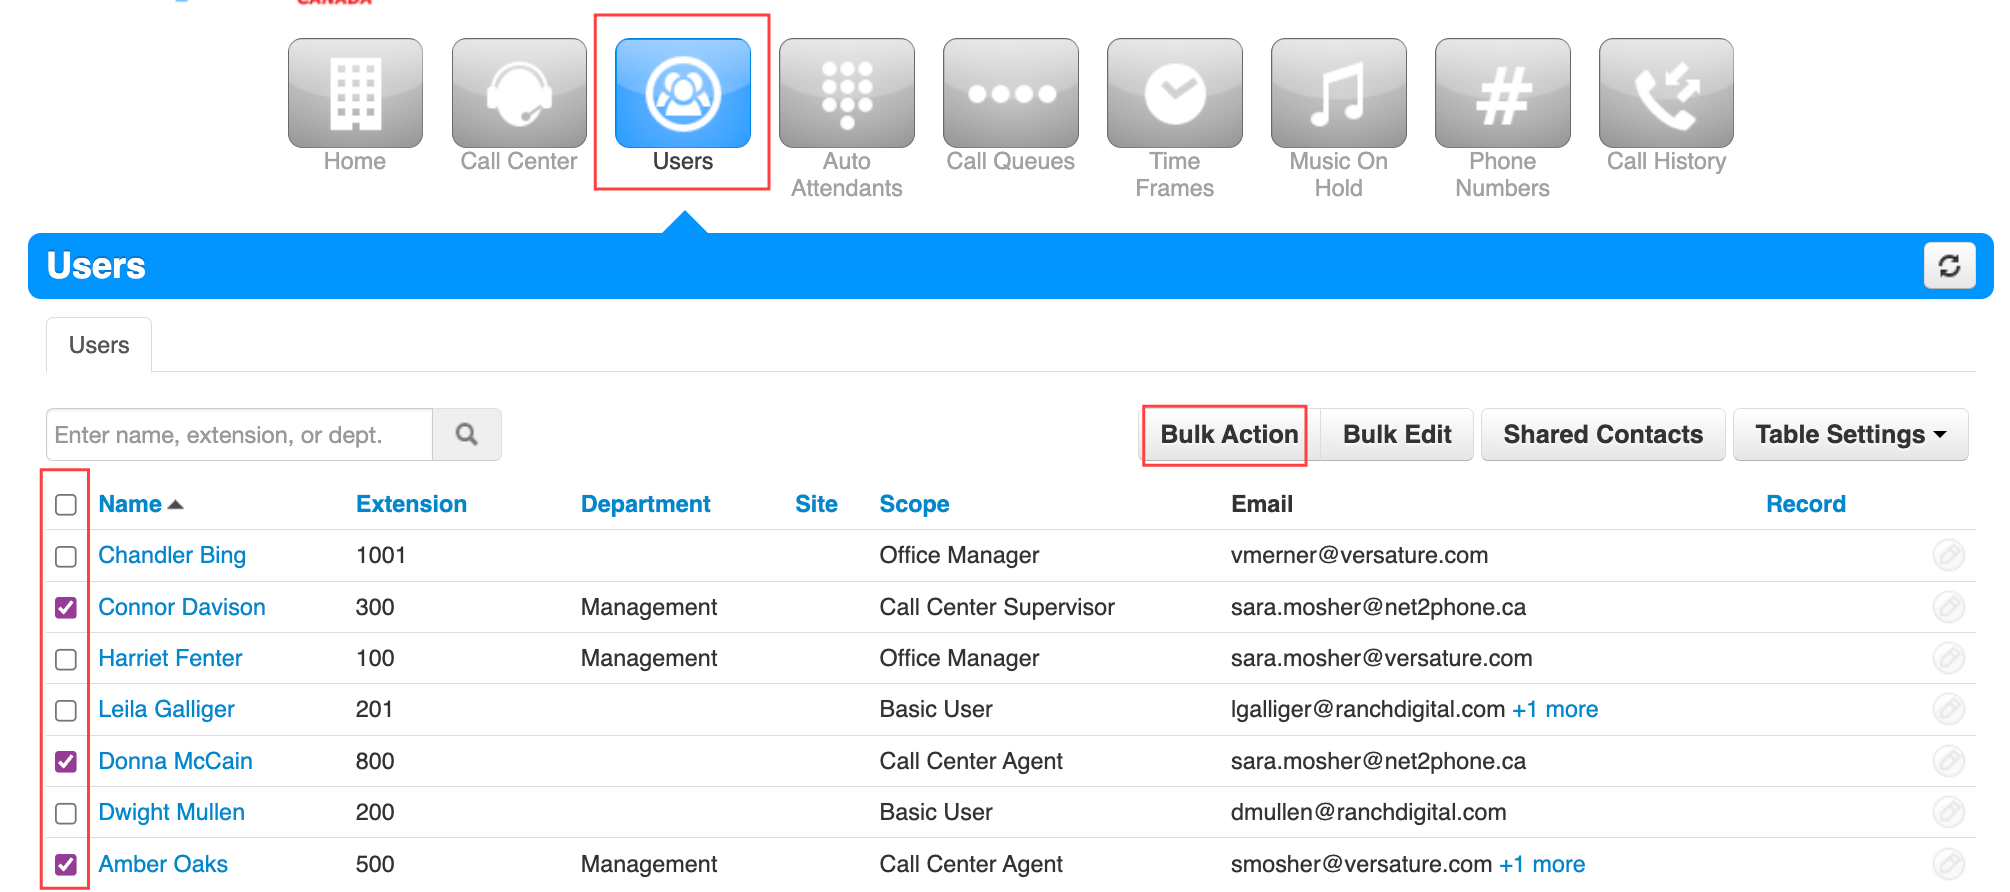
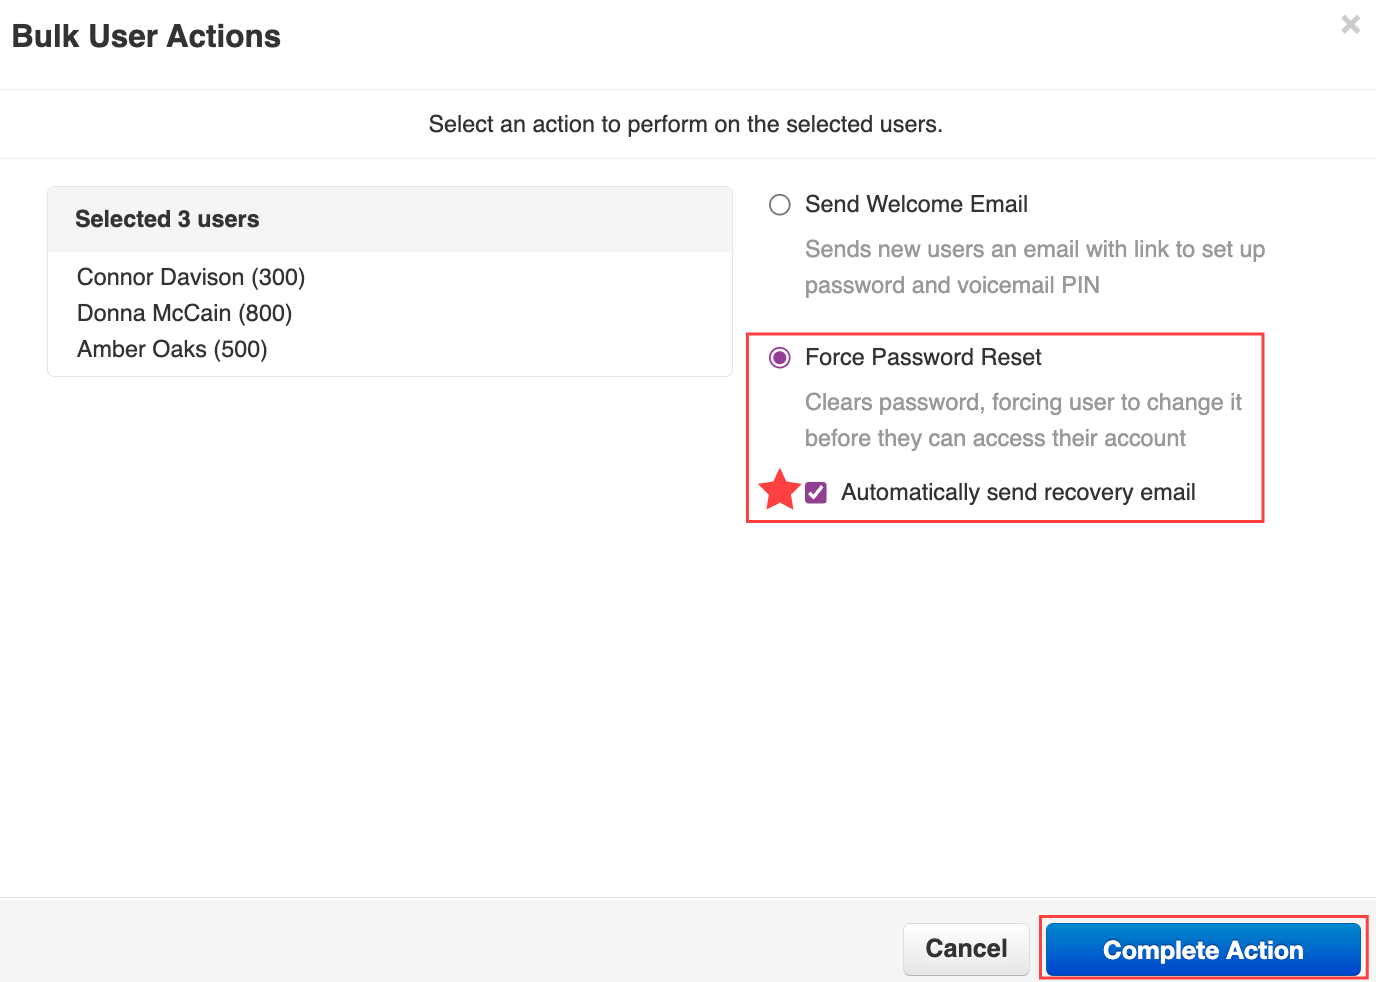
- Click the radio button to Force Password Reset.
- Click Complete Action.
